As vision inspection systems become more popular, suppliers are adding features and making them easier to use. Advances include new devices for measurement, as well as software upgrades that improve equipment performance and geometric dimensioning and tolerancing (GD&T) analysis — the comparison of actual parts against reference models.
INTRAVIS
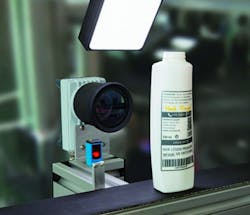
This fall, Intravis, which makes inspection systems for plastic packaging manufacturers, introduced the IntraOne! system. The new product leverages the convenience of a single-camera system with the company's software for inspection of plastic packaging, including bottles, containers and preforms, as well as decorations and labels. Measuring ovality, diameter and other attributes, it can inspect up to 30 objects per second for contamination, deformities, scratches and color variations.
The need for a single-camera quality-control system in the plastic packaging industry has been growing for years, Intravis CEO Andreas Mueller said. But while demand is growing, so is the need to save space on packaging lines. The IntraOne! is designed to be easily integrated into any production line, including high-speed bottling and preform manufacturing lines.
"Our customers came to us because they wanted a simple system with only a single camera to inspect one feature of a product," he said.
Smart cameras have been on the market for a while, but programming them is up to the plant, which may have to hire engineers to set them up. With the purchase of the product, the user receives the services of a technician who devises the optimal configuration for the inspection tasks. The technician also installs the system.
Because the camera includes IntraVision software that works seamlessly with an industrial PC, it is easy to use and set up.
Mueller said that vision systems are essential, so that any issues in the production process are detected and corrected as soon as possible.
COGNEX
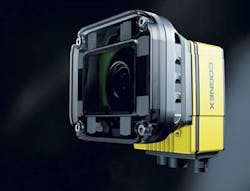
Cognex's second-generation In-Sight 7000 series, a suite of rugged, stand-alone, modular vision systems for inspecting parts in a wide range of industries, is suited for a variety of factory environments.
The systems' modular design allows for more than 400 field-changeable configurations, while also offering users the ability to easily move cameras if the factory is reconfigured in the future.
"The modular lighting and optics, including field-changeable autofocus, minimize the need for external lighting," said Joerg Kuechen, Cognex senior VP of vision products.
The In-Sight 7000 housing is rated for use in harsh industrial conditions. The systems include the Cognex Flexible Image Technology, featuring a patent-pending LED ring light that produces even, diffused illumination across the entire part.
Users can select from a variety of light colors, optical filters and polarizers to meet specific application requirements. They also can choose from an array of autofocus lens options.
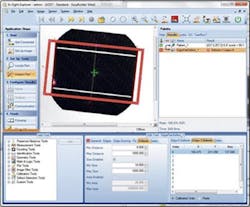
In-Sight 7000 vision systems feature the company's In-Sight Explorer software for setting up and monitoring machine vision inspections. The software includes the EasyBuilder interface for step-by-step application setup and the In-Sight spreadsheet view for control.
The system also includes PatMax RedLine pattern-matching technology, OCRMax optical character recognition and SurfaceFX feature-extraction technology.
LASER DESIGN
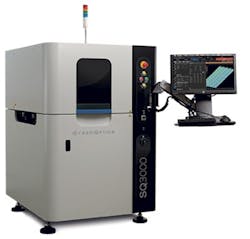
Laser Design's SQ3000 coordinate-measuring machine (CMM), which the company officially rolled out last month, provides inline inspection of surgical components, cell-phone components and other small items that require fast, precise inspection, President and CEO C. Martin Schuster said. Customers also can use the device to scan smaller-profile precision parts such as those employed in the technology, aerospace and automotive industries.
The SQ3000 gives users an extremely clear view of all areas of a product and inspects hundreds of features with a speed that is six times faster than traditional CMMs, he said.
The SQ3000 uses the 3-D sensing technology of Laser Design parent company CyberOptics Corp., Minneapolis. The technology includes four multiview 3-D sensors and a parallel projector that simultaneously captures and transmits multiple images. The proprietary fusing algorithms merge the images together to produce high-quality 3-D images and high-speed inspection.
The SQ3000 CMM uses CyberCMM, a comprehensive software suite of coordinate-measurement tools that provides highly accurate measurement on all critical points much more quickly than a traditional CMM. It can measure attributes such as coplanarity, distance and height, as well as X-axis and Y-axis data, and disregards reflections caused by shiny components that can cause difficulties, Schuster said.
He added that setup for the system is much quicker than for traditional CMMs, with less than an hour needed for programming.
VISION ENGINEERING
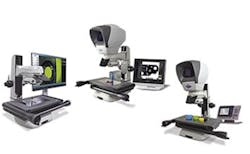
In the fall, Vision Engineering launched Swift Pro, its lab-based series of noncontact measurement equipment, in the U.S. The systems are designed to deliver fast and accurate two- and three-axis measurements, as well as detect defects.
Users can choose Swift Pro systems that offer either optical or video capabilities, or both. The optical systems use the company's patented Dynascope viewer technology instead of an eyepiece for more ergonomic viewing.
The series includes three systems:• Swift Pro Cam is the company's entry-level video measuring and inspection system. It comes with a high-definition video camera and a 200mm-by-100mm measuring stage, which also features factory-set, non-linear error-correction calibration for accuracy.• Swift Pro Duo incorporates both video and optical technologies, enabling the user to seamlessly switch between video and optical measurements. The dual technology is designed to increase accuracy, particularly for materials with hard-to-detect edges. "The Swift Pro Duo is perfect for the plastics industry as it combines two technologies into one machine; the dynascopic head allows the operator to measure hard-to-distinguish features, and the video makes for fast, repeatable measurements regardless of the skill level of the operator," said Simon Cosham, Vision Engineering's North American metrology sales manager.• Swift Pro Elite is an optical measuring microscope providing accurate measurements, even for difficult-to-measure objects such as black or transparent plastics. The patented optical viewer clearly defines edges with high resolution and true-color images. The Swift Pro Elite is available with either an 8-inch-by-4-inch or 6-inch-by-4-inch measuring stage.
The new features built into the Swift Pro series include an integrated Z-axis tape encoder. Improvements to the illumination enhance edge detection, especially for difficult-to-view components.Every Swift Pro stand has pre-drilled holes for mounting the Z-axis encoder, available with the system's upgrade kit.
The overall design of the Swift Pro has been improved for ease of use. The systems have been simplified and require fewer system components and less cabling. The power supply unit has the option for built-in Metlogix printed circuit boards to support its M-series software, eliminating the need for a separate Metlogix box.
WERTH
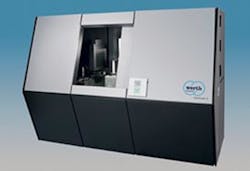
With recent enhancements to its WinWerth metrology software, Werth has furthered the capabilities of the CMMs and X-ray measuring machines it makes. The machines, which are driven by the software, can be used by plastics processors for part inspection, as well as by mold makers for mold validation, said Robert Kozlowski, the company's VP of marketing and sales.
Over the past year, Kozlowski said Werth has added a feature called Mold Correction to its software. With the feature, users such as mold makers can compare measurements of an actual part to data from its CAD representation. To correct for deviations, the software can then replace the CAD model surface with the corrected surface to create a new toolpath.
"The measurement results can be imported directly to generate corrected CAD data for mold rework by using the Mold Correction function in the WinWerth software," Kozlowski said.
Also now available as options to WinWerth are features known as Autocorrection and Werth OnTheFly CT; both address issues intrinsic to making computed tomographic (CT) scans.
Autocorrection is Werth's term for automatic, virtual compensation of distortions created by the X-ray process. To deal with such distortions, users have had to employ multiple sensors, but Kozlowski said Werth has made recent advancements in algorithms and part and material simulations.
"Plastics are pretty cool because you don't get a lot of [distortion]," he said. "It's a very easy material to penetrate. CT was made for plastic." Even so, he said the greater precision can be a benefit to makers of parts that require tight tolerances, such as medical components and diesel injection nozzles.
According to a recent gauge repeatability study, a Tomoscope S scanner equipped with the new feature could compensate for artifacts with an accuracy of within 1 micron.
The other new feature, OnTheFly CT, improves upon the process by which Werth's CT machines take scans. In conventional start-stop operation, the rotary-table-machine axis turns to reposition the workpiece, then stops as each radiographic image is captured, so the image does not pick up blur during continuous exposure. OnTheFly CT greatly increases the number of rotary-movement increments, saving a significant amount of time. For example, Kozlowski said a scan that might have taken 20 minutes or more without the feature can be completed in just a couple minutes with it. This means parts are exposed to less heat and more parts can be scanned in a given amount of time.
"So, we can do a very fast scan very, very accurately and get very good results," he said.
CREAFORM
Like Werth, Creaform is enhancing its hardware with software upgrades. On Dec. 4, Creaform, a maker of portable and robot-mountable measuring devices, is launching the latest version of its software platform and application suite, VXelements 6.1. The latest version includes improvements to the suite's dimensional inspection software module, VXinspect.
"Whether it's using basic distances and angles, geometric features, a complete colormap or advanced GD&Ts, VXinspect has a solution for any type of inspection," said technical product manager David Robichaud.
With colormaps and datum reference frames — a method of laying measured scan data over the reference — provided by the software, users can compare scanned data with a reference model.
Overall, Robichaud said, Creaform has improved how users interact with the software. With the newest version of VXinspect, users have access to a guide for better understanding datum reference frame alignment, making it easier for them to make corrections. The company also has improved its snapshot tool, so users can more quickly transform a 3-D representation of the part into a report.
With the ability to compare a representation of an entire part against a reference model, users can spot problems."So, the ability to see in the 3-D scene, in the dimension table [XYZ coordinates], and tie those with the GD&T results, makes it easy to understand, or to know that a hole is too large and not drilled at the correct location," Robichaud said.
The software can be used with Creaform's Maxshot 3D, an optical CMM for measuring large parts that boasts accuracy to within 0.015mm per meter. It also can be used with C-Track, a portable measurement device.
By Phillip Britt, correspondent
For more information
Cognex Corp.,Natick, Mass., 855-426-4639, www.cognex.com
Creaform USA Inc.,Costa Mesa, Calif., 888-979-5220, www.creaform3d.com
Intravis Inc.,Norcross, Ga., 770-662-5458, www.intravis.com
Laser Design Inc.,Minneapolis, 952-884-9648, www.laserdesign.com
Vision Engineering Inc.,New Milford, Conn., 860-355-3776, www.visioneng.us
Werth Inc.,Old Saybrook, Conn., 860-399-2445, www.werthinc.com

