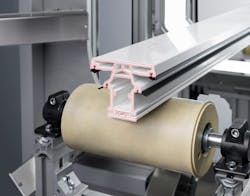
What’s new? The device, which came out a few months ago. Based on the ProfilControl 7, which can measure only the outer contours of profiles, the ProfilControl 7 DX ICSM can measure both inner and outer contours — the “ICSM” in its name stands for inner cross-section measurement. Innovations include new LED/laser lighting technology and the incorporation of ProfilControl 7 software, which compares actual measurements to reference values.
Benefits The quick, accurate detection of flaws, allowing for faster correction of problems and a reduction in scrap. The device eliminates the need for manual measuring processes, and, unlike off-line systems, it can check all profiles of a batch, rather than just random samples. To ensure accuracy, it employs multi-camera sensors capable of disregarding the interference that can be caused by contamination created by hot cutting techniques.
Pixargus Inc., West Chester, Ohio, 888-539-4689, www.pixargus.com


